There are so many fun aspects of food photography and recently I’ve really loved playing with GIFs and cinemagraphs. I figured I’d detail the process of how to create a food photography GIF (after photographing the GIF, which will be another detailed post soon). This is a pretty simple process and once you’ve got it down, it’s really easy to replicate and remember. Here’s to more complex GIFs and more fun in Photoshop!
First, you’ll need your set of images, all edited the same (I find the paste settings tool to be useful in this instance) and exported from Lightroom or whatever software you use as detailed below. These settings are simply what I choose to make sure my images stay high-quality but also don’t take down the internet because of size.
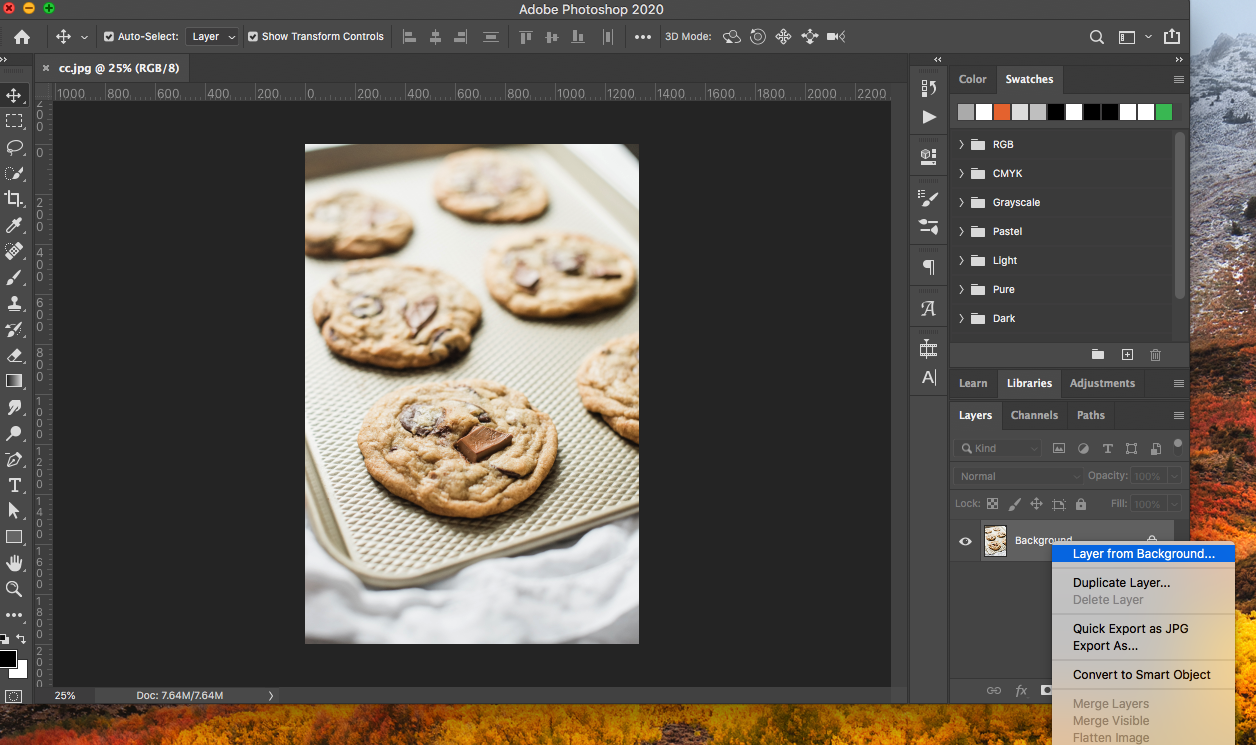
Once you have your photos ready, pull the first image into Photoshop (I usually drag that image onto the Photoshop icon to open a new document) and right click over your image to select “Layer from Background.”
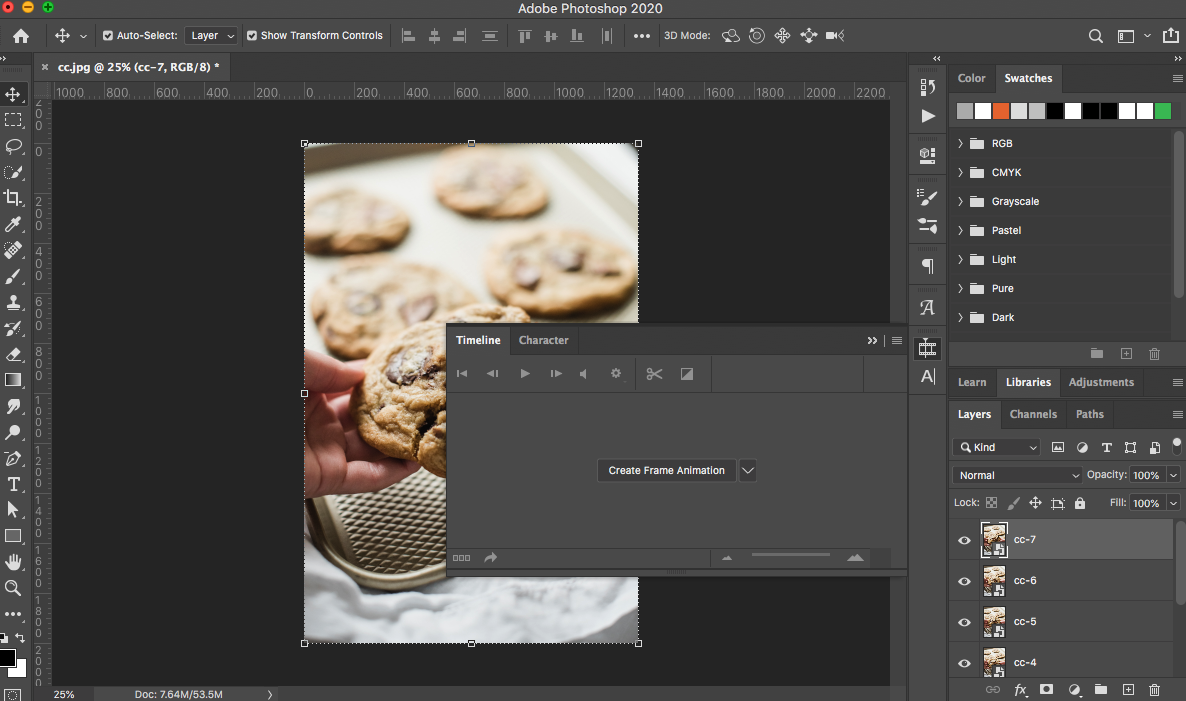
After that, pull the rest of the images into Photoshop as separate layers. You can easily select them from a window and pull them all in at once and then hit the check mark at the top right of the screen to confirm them in as separate layers.
Now, we get to the good part. Once you have all of the images you’d like to use in the GIF in Photoshop on separate layers, open the Timeline panel (Window > Timeline) and select “Create Frame Animation.”
Once that’s selected, choose the “Make Frames from Layers” option to populate your GIF.
Once you have all of the images in the timeline in order, choose how many seconds you’d like each image to show for. I usually go for the 0.2 or 0.5 selection, but play around and see what works for you!
After, hit the “Play” button to ensure it runs how you’d like it to. Make any adjustments, then get ready to export.
To export for Instagram, you’ll need to have this in video format (.mp4). In order to do that, go to File>Export>Render Video.
These are the settings that I use, and they seem to work well for me and for posting to Instagram. It should pre-populate the document size, but make sure that it’s the same size as your image or you’ll get wonky black strips on the sides or top and bottom of your video. Once your video is exported, you are ready to upload to Instagram! Instagram will automatically loop your video, which makes it really easy for you. One thing I’ve learned about these short GIFs is to make sure that they are simple and short. Longer ones do not hold people’s attention span unless they are a more intricate stop motion video, which obviously will take a lot more time, planning, and expertise.
If you’d like to add these GIFs anywhere else, the easiest way is GIF format. To create a GIF, choose Export>Save for Web (Legacy).
These are the settings that I use and again, they work for me! Both of these formats are nice to have, especially if you want to upload your GIF to your portfolio. Videos are a little more complex when adding to Squarespace, for example, so using a GIF format means that you can have GIFs and images side by side, which makes for a really compelling portfolio!
I hope this little article on How to Create a Food Photography GIF was helpful and please let me know if you have any questions for me!


